We’ve had lots of questions about our gabion baskets so I thought it might be helpful to have some tips and answers in a dedicated post.
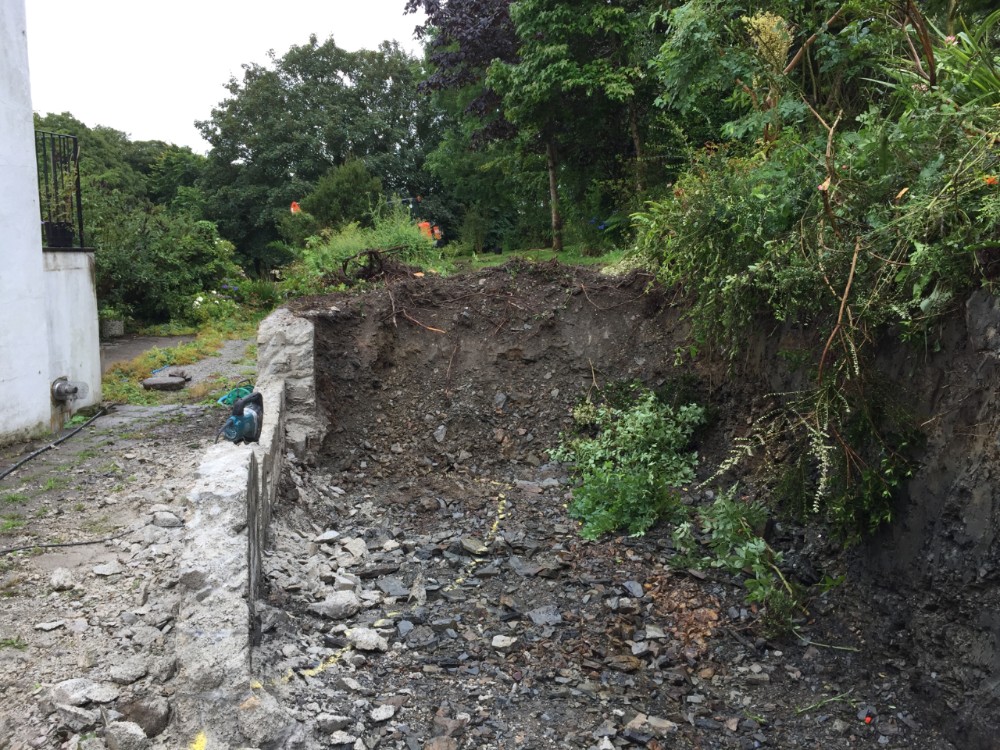
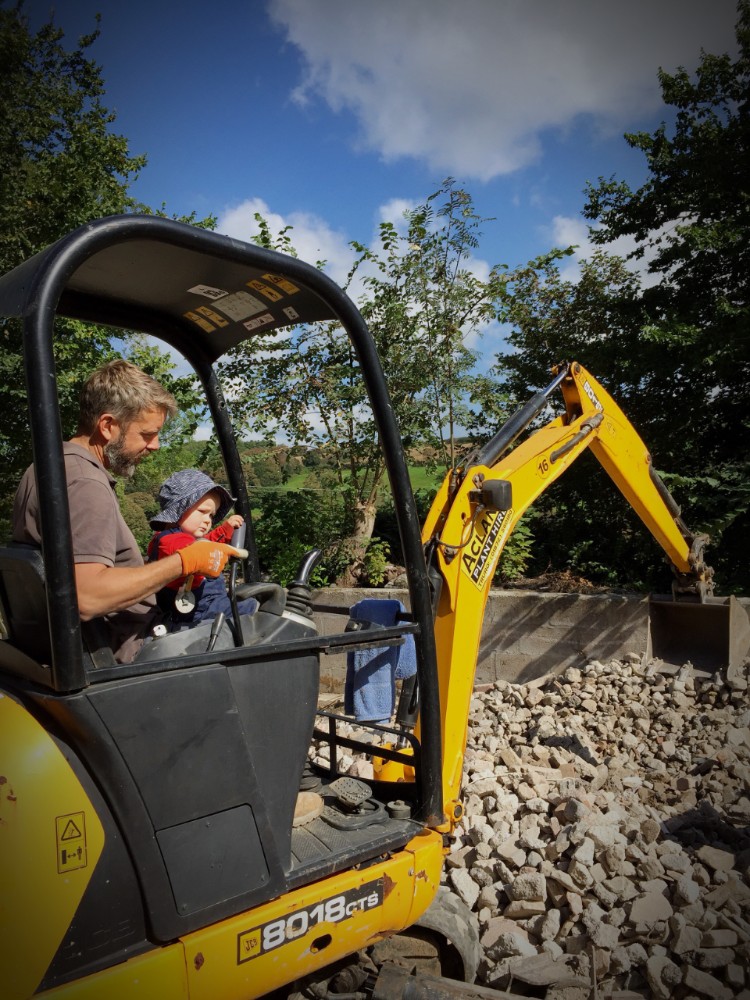
A new extension to our home has meant approximately 90 tonnes of earth needed to be removed from the terraced garden at the rear of our house. This left a 2 meter high wall which needed to be retained to avoid collapse.
Our options were to build a retaining wall, a graded slope or gabion baskets. The graded slope based on our structural engineers calculations would reduce our garden to nothing but the slope. The retaining wall would be time consuming and costly. Gabion baskets were our best option and we also liked the idea of looking out on to a dry stone wall and not a high rendered wall.

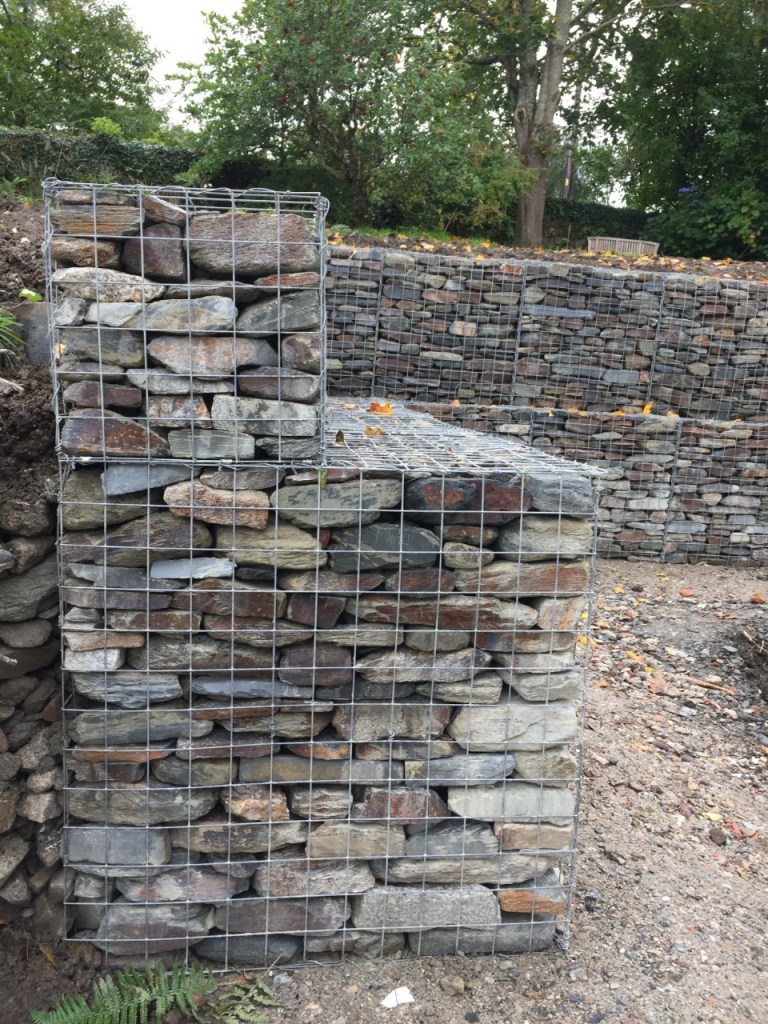
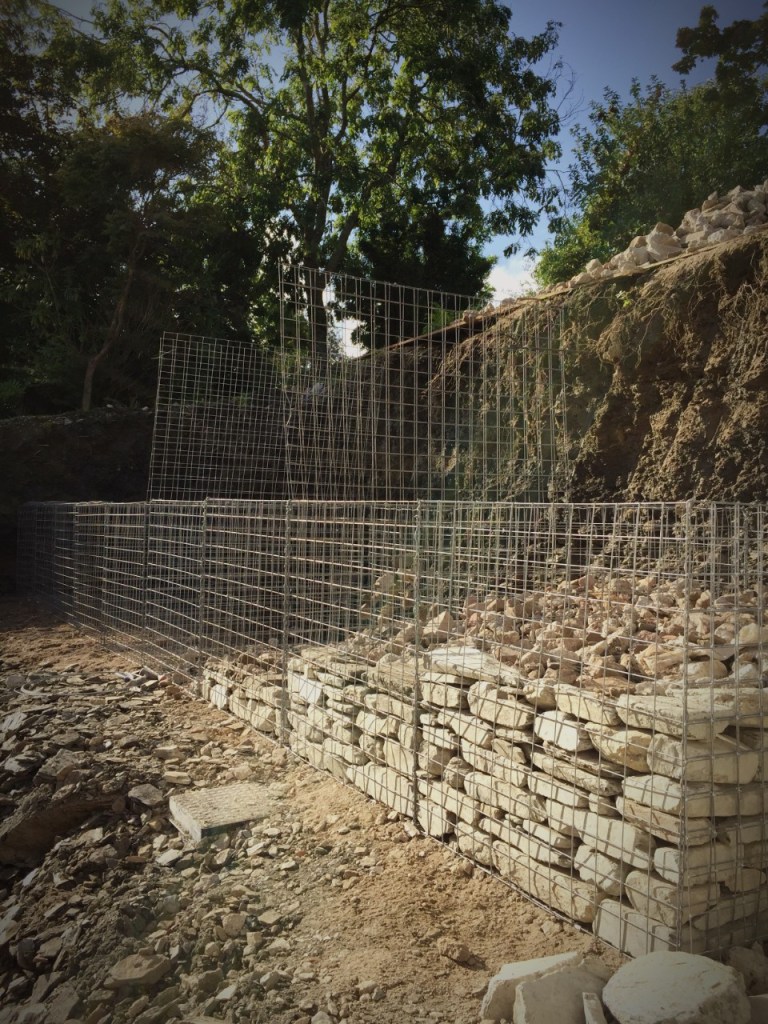
Our structural engineer has calculated that in order to retain the 2 metre high bank we needed a minimum of a 1m3 gabion basket stacked one on top of another. Because of the close proximity to the house (1m from the walls of the extention) we were conscious that we wanted to let as much light in as possible. The solution was to step our gabion baskets and create a series of terraces.
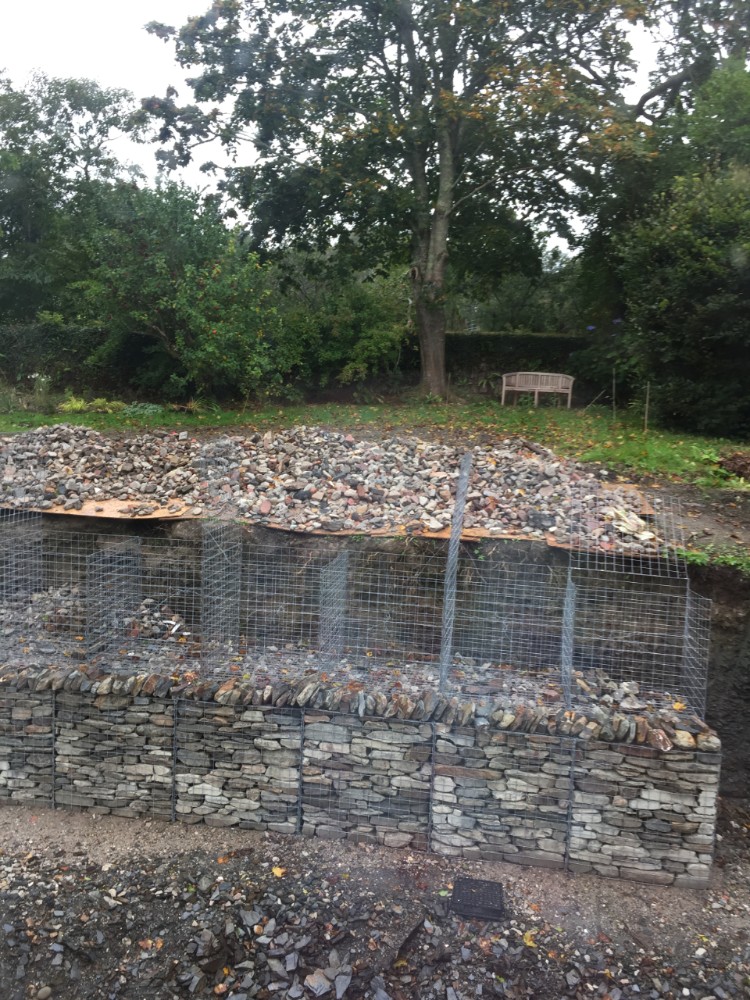
Because gabions must sit on directly top of one another to avoid collapse, we had to create a step using D 1.5m x W 1m x H 1m on the bottom with a 1m3 on top for the 2 metre high garden bank. For the 1.5 metre garden bank we used 1m3 on the bottom and H 0.5m x D 0.5m x W 1m on the top.
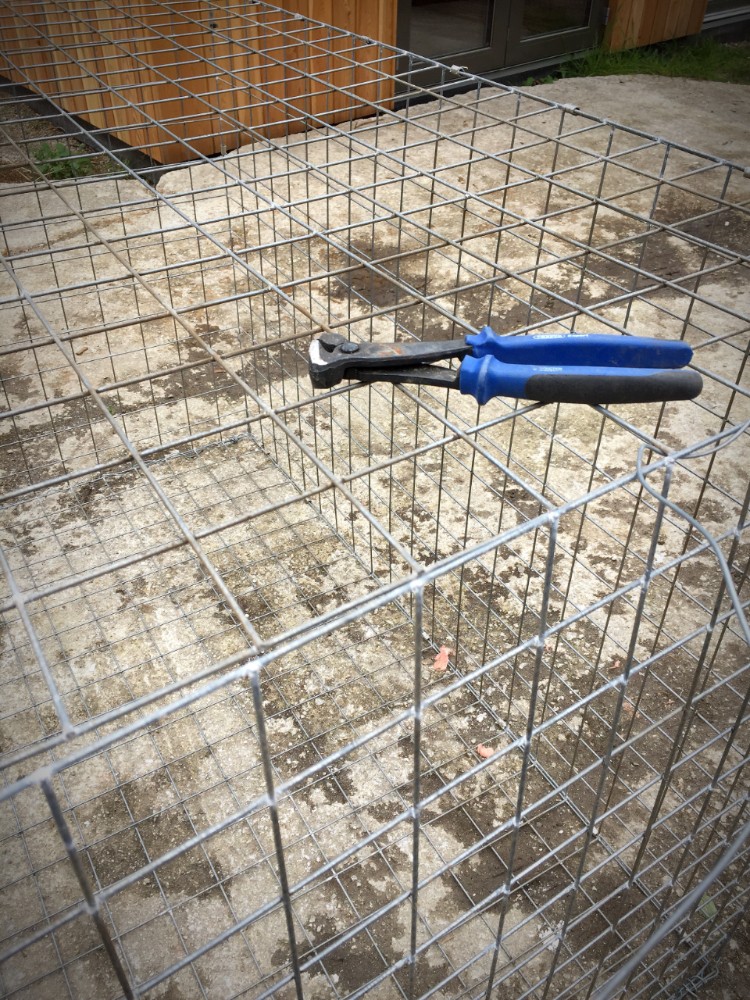
We ordered our galvanized gabion baskets from Devoran Metals. They arrive flat pack with rolls of galvanised wire. It took approximately 20 minutes per basket to thread and secure wire around the four upright corners. Smaller baskets would obviously be quicker.
Gloves with grip but good finger movement were essential. Heavy duty wire cutters, the sort that are used for agricultural fencing are necessary, and long nosed pliers made the wire twists easier.
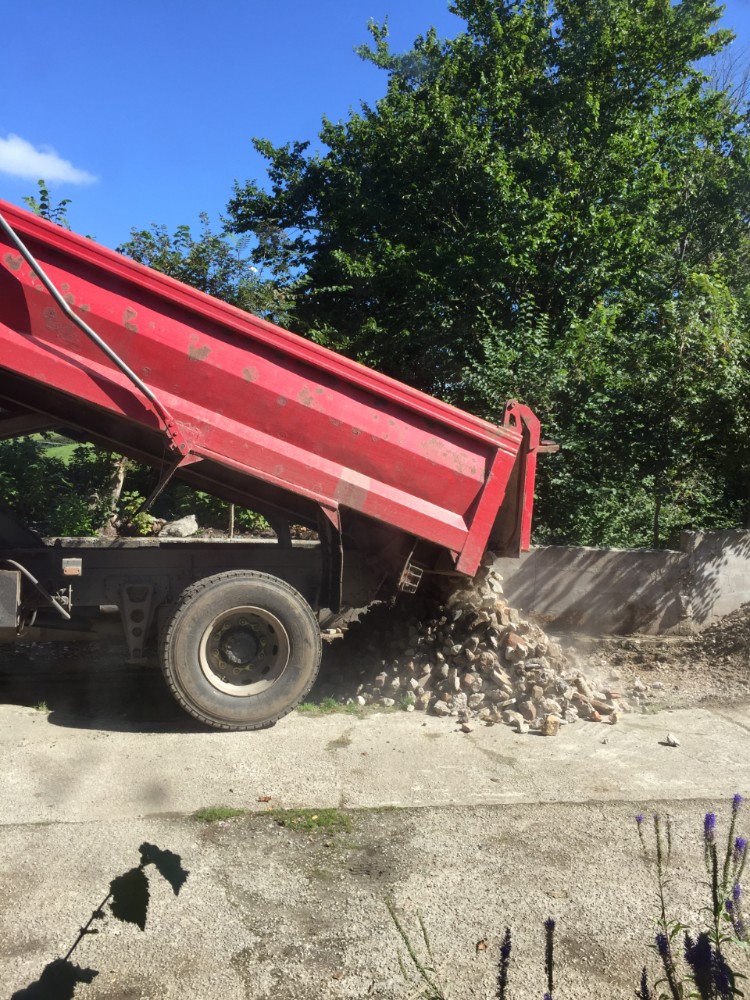
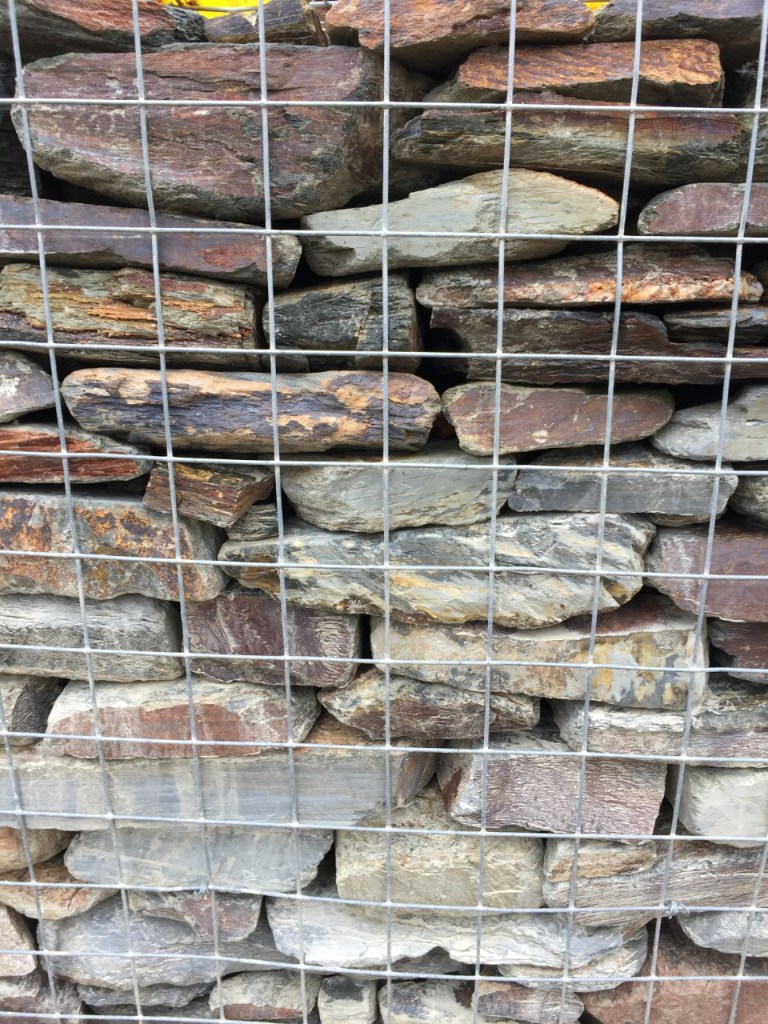
The manufacturer of the gabion baskets recommended that we used 1.5 cubic tonnes of stone in every 1 cubic metre basket. With budget always on our mind, we chose to have quarried gabion stone from Lantoon Quarry near Liskard in the front of our baskets and graded concrete rubble from stone recycling firm TH Douce and Sons in the back of the baskets.
When filling the baskets, it was recommended that we wire four baskets together and fill them in a staggered fashion. This is supposed to avoid bulging which is a common problem with the larger gabion baskets. We had also internally braced the baskets using the manufacturers instructions to try to further combat bulging.

Top Tips for using gabion baskets
- Ensure the surface of the wall that the baskets will support is as straight as possible. The baskets need to sit snug to the wall. We had a few small gaps where some collapse of the bank had happened prior the the baskets installation. We packed the gaps with the concrete rubble behind the basket.
- Baskets can be installed by anyone with minimal tools. Gabion basket manufacturers will be able to advise on the correct basket size, stone to fill the baskets and how to fill the baskets properly.
- Machine fill when ever possible using a mini-digger. If you want a dry stone wall effect, the process will be slower as you need to build the wall and gradually back fill.
- Allow several weeks for a large number of baskets. We installed 28 gabion baskets (45 tonnes of stone) and it took one person approx. 10 days to install them in a tricky access site using the dry stone wall effect.
